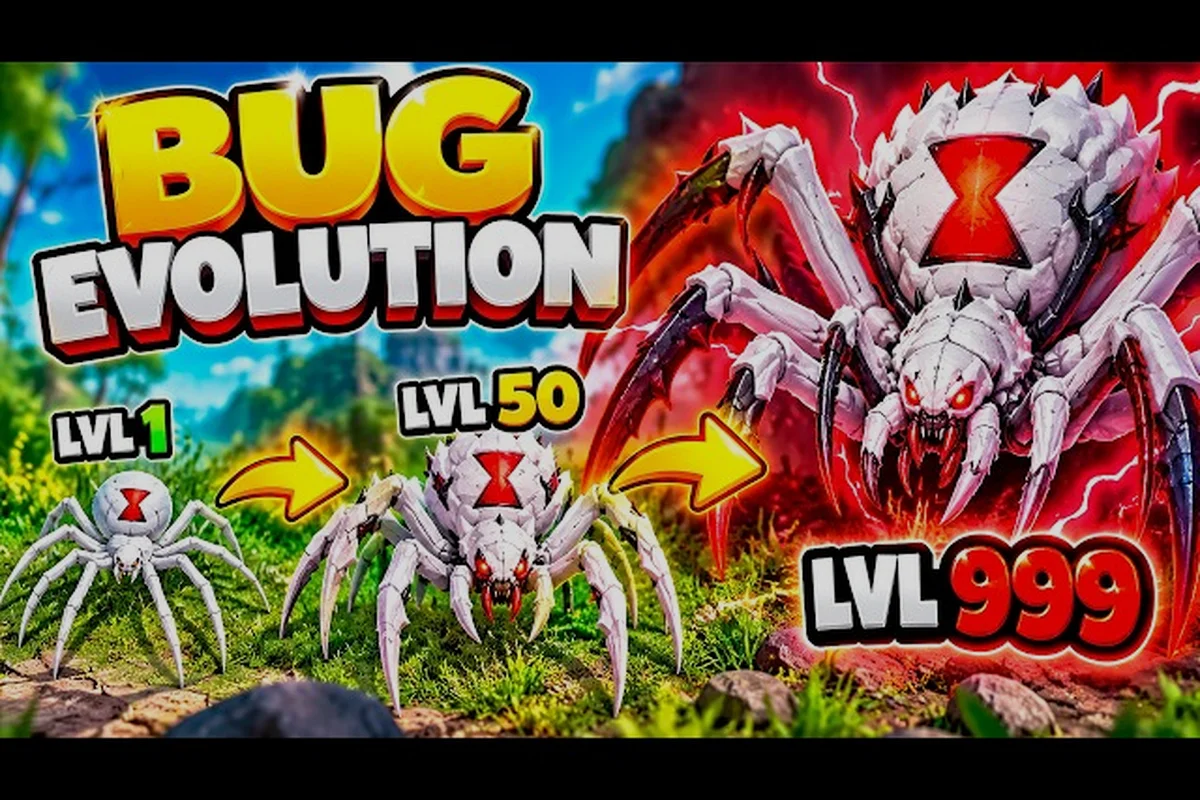
The bug evolution desert matters because sparse terrain and border routes directly shape each hunt. Food clusters, landmark chokepoints, and territory connections determine which evolution areas are practical to reach, while exposed crossings can force encounters with stronger bugs. Comparing nearby regions before committing to a route helps reveal when a desert trip rewards a larger insect through better resources, more territory control, or safer access to the next evolution area.
Bug Evolution Desert Location and Terrain
The bug evolution desert is a distinct region within Bug Evolution’s open world, where the terrain changes from the food-rich grass fields to a more exposed hunting zone. Its exact boundaries are not marked by an official map overlay, so players should treat the castle, hills, and field edges as practical orientation points rather than relying on a fixed minimap.
Community reports and in-game observations indicate that the desert is relatively compact. A mobile insect can cross major parts of the map in roughly a minute or two, which means travel time is rarely the main limitation. Food distribution matters more: the grass fields contain the densest starter food, while the desert presents a more selective hunting environment.
Locating the Desert
The most reliable approach is to travel from the starter grass fields toward the hills and use the stone castle as a visual reference. Because the open world does not display a complete map, players often identify regions by connecting landmarks. The desert lies beyond the safer starter area, but approaching it from the castle side can help you judge your position before committing to the exposed terrain.
That same landmark network is covered in more detail in the guide to grass fields, the castle, and nearby open areas. For new players, the sensible route is to collect several early meals near spawn, evolve once or twice, and then make a short reconnaissance run toward the desert. Reaching the region too small often leaves you with little stamina or health for a contested fight.
Reading the Terrain
The desert’s exact food values are not published, and community data can change with updates. What players can observe consistently is that food is less uniform there than in the starter grass fields. This makes a desert visit more deliberate: travel with a full health bar, keep some stamina available, and do not chase every distant target without confirming a safer escape route.
| Terrain cue | Likely resource pattern | Strategic value | Main risk |
|---|---|---|---|
| Dense grass | Starter food appears in greater numbers | Best early growth and respawn access | Crowded early-game competition |
| Field edge | Mixed food and nearby prey | Useful staging point | Exposure to stronger insects |
| Hills | Longer route around the map | Natural orientation landmark | Travel fatigue |
| Stone castle | Mid-tier food around its approaches | Cover and navigation reference | Central contests |
| Bug evolution desert | Selective food distribution | Better opportunities for larger targets | Fewer easy meals |
This table uses observed regional behavior rather than unpublished spawn percentages, so it should guide scouting rather than guarantee a fixed route. The desert’s selective food distribution can reward players who identify larger targets, but the fewer easy meals also make each search more stamina-intensive. Compare the terrain cues before committing: dense grass offers greater starter-food numbers, while the desert’s approaches may lead to mid-tier opportunities but expose you to stronger insects and longer travel between food clusters. Use the table to prioritize where to spend time, not to replace an exact spawn map.
Desert Territory at a Glance
The desert should be treated as a transition hunting zone rather than a safe farming area. Its value comes from the opportunities created by travel pressure: prey may be less predictable, but moving through the territory can expose targets that never appear in the grass fields.
A useful territory plan is to begin with food-first movement, then switch to target-first movement once your insect has enough size and durability. If your goal is simply to gain small experience, the starter fields remain more efficient. If your goal is to find stronger prey or prepare for later threats, the desert can be worth the extra exposure.
Bug Evolution Landmarks and Navigation Cues
Bug evolution landmarks serve as practical navigation anchors because the game does not currently provide a complete full-map overlay. The stone castle is the clearest shared reference, while the hills, field edge, and distant terrain changes provide secondary cues. Players who learn these relationships can cross the bug evolution regions without repeatedly circling the map.
The Stone Castle Reference Point
The stone castle is more than decoration. It offers visual cover, gives teams a recognizable meeting point, and sits near an area with mid-tier food. When traveling from the grass fields, use the castle as the main “north” reference even though the game has no confirmed compass labels. Once you can place the castle behind you, the route toward the bug evolution desert becomes much easier to repeat.
The approach matters as much as the structure. Food-rich crossings occur where players moving between biomes meet, and the castle approach is one of the known concentrations of such activity. Instead of attacking from immediately beside the walls, watch the nearby crossings and let your opponent commit to a target before you intercept.
Hills and the Field Edge
The hills are a secondary landmark because they form the transition between the open field and less forgiving terrain. They also mark useful food corridors: insects entering or leaving the grass fields often pass through the same routes. A mid-game spider can chain a short sequence of fights here, provided the player avoids overextending after the first kill.
Treat the field edge as a decision checkpoint. If your health is low, your stamina is nearly depleted, or your insect has not yet unlocked a stronger form, return to the fields. If those resources are healthy, the edge can serve as the launch point for a controlled desert expedition.
Using Landmarks Under Pressure
During a chase, the nearest landmark matters less than the next safe turn. A common mistake is running directly toward the castle or hills because they are familiar, only to encounter a stronger insect in a confined space. The better approach is to rotate around the terrain, use elevation and open sightlines, and save enough stamina to escape toward a region where smaller enemies spawn.
| Landmark | Best use | Route-planning value | Combat advice |
|---|---|---|---|
| Stone castle | Orientation and cover | Confirms position near central routes | Avoid fighting in the narrowest approaches |
| Hills | Boundary marker between biomes | Leads toward the desert from the fields | Watch food crossings near the transition |
| Open field | Long sightlines and faster movement | Useful for spotting incoming targets | Avoid isolated mid-tier insects |
| Grass fields | Reliable early meals and respawn access | Recovery point after a failed desert trip | Leave before stamina becomes critical |
| Desert terrain | High-risk hunting and future boss context | Connects the map’s outer regions | Keep an escape line open |
Because the open world lacks precise map markers, notes about these landmarks are more reliable than remembered directions. Write down what you see at each transition: the shape of the terrain, nearby insect sizes, and whether food is visible. Those details quickly become a personal route map.
Bug Evolution Areas and Regional Food Value
Bug evolution areas do not provide identical resource value. The grass fields are the strongest starting region, the castle surroundings offer a mid-tier alternative, and the desert is better suited to players who can handle uncertainty. Understanding this hierarchy prevents a common mistake: traveling far from spawn for a tiny meal that could have been collected safely at home.
Food Availability by Region
The current build does not publish exact food quantities for each biome. Community observations instead show a practical gradient: starter food is densest in the grass fields, mid-tier food appears around the castle approach, and desert targets are more selective. That makes the bug evolution desert less efficient for basic growth but potentially valuable for bigger insects seeking stronger prey.
| Region or area | Food profile | Best progression stage | Efficiency | Risk rating |
|---|---|---|---|---|
| Starter grass fields | Dense small food | Newly hatched insects | Very high | Low |
| Grass-field crossings | Concentrated mixed food | Early and mid game | High | Medium |
| Castle surroundings | Mid-tier opportunities | Mid game | Medium to high | Medium to high |
| Hills and field edge | Corridor feeding opportunities | Mid game | Medium | Medium |
| Bug evolution desert | Selective food and stronger targets | Mid to late game | Variable | High |
| Underground cave | Not yet available in the open build | Future content | Unconfirmed | Unconfirmed |
The underground cave is not a current alternative to the desert. It is an announced map addition scheduled for November 19, while the desert Sand Worm is associated with the November 9 update. Treat both as future content rather than current routes, and check the bug evolution event calendar and update details before planning around either release.
Why the Desert Is Not an Early Farming Zone
Early insects need predictable meals, not merely reachable ones. The starter fields keep food close to the spawn and respawn point, reducing both travel cost and exposure. In the desert, a missed target can cost enough time and stamina to turn a planned hunt into a retreat, especially when every nearby insect may be several evolution stages ahead.
A new player should complete basic growth mechanics before making the desert their main source of food. The beginner guide to Bug Evolution on Roblox explains the core loop of eating, growing, and using the Bug Tree. Once you can reliably feed and identify a target, the desert becomes a much more reasonable destination.
When Desert Hunting Becomes Efficient
Desert efficiency improves when your goal changes from “collect anything edible” to “find one worthwhile target.” Larger insects naturally draw better prey, while stronger forms can secure food that smaller players cannot contest. The location also becomes valuable when an update adds themed encounters or rewards, because players are already navigating the same terrain where those events occur.
Before leaving the safe region, check three conditions that determine whether a desert hunt is efficient rather than merely possible: confirm that your target’s territory is reachable without crossing too many contested bug evolution areas, compare its expected food value against the stamina cost of pursuit, and identify the nearest escape point in the bug evolution terrain. For example, a stronger insect worth chasing may still be a poor target if it repeatedly pulls combat into a region where your health and stamina are already depleted.
-
Your health bar is high enough to absorb a failed hunt.
-
Your stamina can support pursuit plus a retreat.
-
You know the nearest return route through the hills or fields.
If any check fails, route to a grass field instead. A controlled second circuit preserves stamina for gathering food without forcing a risky pursuit through bug evolution desert territory. Treat a safe, repeatable route as the better hunt when it produces steady gains over several runs; crossing the map quickly may expose you to contested bug evolution areas, depleted stamina, and a failed escape before the reward is secured.
Bug Evolution Territory and Safe Route Planning
Bug evolution territory becomes easier to control when you plan routes around food corridors, escape landmarks, and respawn access. The desert is not an isolated arena; it is part of a connected open world where every trip begins and ends near territory you already know. A good route minimizes recovery distance while still giving you a chance to find higher-value prey.
Outbound and Return Routes
Make the trip from the grass fields toward the desert deliberate. On the outbound leg, collect enough food to offset the travel time and stop at the hills or castle as an orientation checkpoint. On the return leg, use the same landmarks in reverse so you can detect whether stronger insects have moved into your route.
This approach creates two distinct plans: a food route for controlled progression and a target route for faster combat gains. Because the desert’s insect population changes over time, compare the edge of the grass fields with the route beyond the hills and castle before committing; a previously safe area may now contain stronger bugs. The food route is safer when Stamina is already low, while the target route only becomes practical when Speed, Health, Bite Damage, and Bite Speed are sufficient for the encounters waiting in the desert territory.
-
Food route: Search smaller targets near the field edge, then return before your stamina falls low.
-
Target route: Enter the desert with a larger insect, circle known landmarks, and intercept one meaningful target.
The first route supports steady growth. The second can accelerate progress but should be reserved for players who understand the five-stat HUD—Speed, Health, Bite Damage, Bite Speed, and Stamina. Each stat affects whether a desert encounter is practical.
Resource and Risk Planning
| Route | Preparation | Best target | Success condition | Recovery plan |
|---|---|---|---|---|
| Quick field loop | Minimal food stock | Small prey | One meal secured | Return directly to grass |
| Castle-to-desert probe | Several early meals | Mid-tier prey | Health and stamina remain above safe margin | Use hills as escape cover |
| Deep desert run | Large evolution form and full health | Stronger target | Secure a clear win | Return along landmark chain |
| Event preparation | Full resources and route knowledge | Themed encounter | Reach location before target shifts | Leave early if positioning fails |
The key rule is to preserve choice. Entering the desert with full resources gives you more than a larger payoff; it gives you the option to disengage. That choice becomes especially important as new player-facing threats arrive, including the desert Sand Worm planned for November 9.
Using the HUD Before Crossing
Do not rely on the insect’s name alone to judge danger. Check the target’s level, your current bite damage, and whether its visible size matches what you can realistically overpower. The Bite Speed stat is easy to overlook in quick fights, but losing the rhythm of attacks can stretch a pursuit and drain stamina. Similarly, Speed affects whether you can reposition before a stronger opponent turns the encounter into a chase.
For boss preparation, compare the desert with the broader Bug Evolution boss guide. That guide is useful for understanding the difference between ordinary hunting and a dedicated boss encounter, while the current desert route should still be planned as open terrain rather than a closed arena.
Handling a Bad Desert Expedition
A failed trip does not need to become a disaster. Retreat toward the hills before attempting a last-second meal, and avoid turning around at the edge of the desert where a target may be waiting. If health is already low, the safest choice is to disengage completely and return to the starter grass fields, which also function as the respawn area after death.
Community experience suggests that players often overestimate the value of forcing a fight after the route goes wrong. A clean retreat preserves food, travel progress, and the chance to return with a larger form. Territory control means knowing when the region is favorable, not proving that you can extract every possible meal from it.
Bug Evolution Terrain Traits and Tactical Encounters
Bug evolution terrain changes how encounters develop. In dense grass, prey and cover are closer together. Around the castle, corridors create concentrated contests. In the desert, reduced visual certainty and longer pursuit lines make positioning more important. These differences affect not only where food appears but also how you should select and approach targets.
Cover, Open Ground, and Sightlines
Open ground is useful for spotting distant insects, but it also gives larger opponents an early approach. The desert rewards players who scan wide before committing to a bite. If a target reacts before you reach it, a straight pursuit can consume your stamina while exposing your health bar to damage.
Use the landscape in stages. Begin with visual detection, then choose a position where the target cannot easily circle behind you. If the attack fails, retreat along the route you already know. The stone castle is especially helpful in this respect because it gives the player a recognizable fallback point rather than a featureless stretch of terrain.
Desert Target Selection
The best target is not always the closest one. Small insects may offer safer food but require repeated bites, while a mid-tier target can provide more value in one sequence. Compare the opponent’s level with your own form, watch how quickly it turns, and avoid beginning a pursuit near a boundary where other players may intercept the result.
A practical scoring method is to evaluate food value, travel cost, combat difficulty, and interruption risk. Small food scores well on safety, larger prey scores well on reward, and the castle or field-edge crossing often scores poorly on interruption risk because traffic is heavier.
Terrain Comparison
| Terrain trait | Grass fields | Castle approach | Bug evolution desert |
|---|---|---|---|
| Food density | Highest | Moderate | Selective |
| Visibility | Limited by vegetation | Mixed around structures | Broad, with fewer visual breaks |
| Cover | Strong | Strong near castle | More dependent on movement |
| Competition | Moderate near spawn | Potentially high | Variable but often intense |
| Preferred target | Small early meals | Mid-tier prey | Stronger targets for evolved insects |
| Retreat value | Excellent | Good | Fair, if landmarks remain visible |
These distinctions reinforce a simple rule: match the route to your current form and objective. The desert becomes better as your capabilities improve, so players should not interpret an early defeat as proof that the location is poorly designed. It may simply be outside their current terrain tolerance.
Preparing for Upcoming Desert Content
The desert Sand Worm is tied to the November 9 update, and the underground cave is announced for November 19. Neither update details were fully verified in the late-October build, so players should not assume exact spawn points, attacks, or rewards. The sensible preparation is general: improve your insect, learn the current terrain, preserve resources, and watch official update announcements when the release arrives.
Because the game is a new 2026 Roblox release and is still changing, recorded routes can become outdated after patches. Check whether a landmark still resembles your memory, confirm that the desert boundary has not shifted, and use the current HUD to judge threats instead of following an old video blindly. That adaptability is the real advantage in such a small but active open world.
Practical Desert Planning Checklist
A reliable Bug Evolution desert trip depends on preparation rather than memorizing a perfect route. Use the checklist below before leaving the grass fields, then adjust it after each expedition based on what you observe. The goal is consistency across several runs, not one unusually large meal.
Before You Leave
-
Eat enough in the grass fields to fill your health bar and restore stamina.
-
Confirm your current insect name and level in the HUD.
-
Identify one visible return landmark, preferably the castle or hills.
-
Choose either a food route or a target route and do not switch repeatedly.
-
Check whether an update has changed the desert or added a relevant encounter.
During the Hunt
-
Scan before biting, because open desert sightlines reveal movement early.
-
Keep stamina available for one escape attempt rather than spending it on a full pursuit.
-
Fight away from crowded crossings when you have the option.
-
Reassess immediately after taking damage, since the fastest route home is often the best route.
-
Record food locations and target levels without relying on an official map that is not present.
After the Hunt
-
Return to the grass fields if your health or stamina falls below a safe margin.
-
Compare food gained against travel time to determine whether the desert was worthwhile.
-
Test the same route with a different target size on the next run.
-
Update your notes after updates, because terrain and spawn patterns may change.
Route Summary by Player Stage
| Player stage | Desert priority | Recommended route | Objective |
|---|---|---|---|
| Newly hatched | Low | Brief reconnaissance only | Learn the boundary and landmarks |
| Early insect | Medium | Field edge to short desert probe | Collect a few safe meals |
| Mid-game insect | High | Castle approach to desert loop | Find higher-value prey |
| Large evolved form | High | Extended desert circuit | Target stronger insects efficiently |
| Event-ready player | Very high | Full resource and landmark plan | Prepare for themed encounters |
The checklist also shows why progression and location knowledge should develop together. Better insects make the desert safer, while experience in the desert helps you reach stronger forms without wasting growth attempts. The complete progression sequence is summarized in the early-, mid-, and late-game planning guide, which can help you decide whether to farm, explore, or prepare for combat.
Frequently Asked Questions
Where is the Bug Evolution desert?
The Bug Evolution desert is an outer region reached from the grass fields, with the hills and stone castle serving as useful orientation points. Because the game does not currently provide a complete map overlay, exact coordinates are unavailable. Players usually identify it by moving beyond the starter area and tracking recognizable terrain changes.
Is the Bug Evolution desert good for early-game farming?
The desert is not the best early farming area because food appears less consistently there than in the starter grass fields. Small insects should prioritize the grass-field food density near spawn, where meals are easier to find and the respawn point remains close. The desert becomes more valuable after your insect has gained enough health, stamina, and combat power.
What should I bring before exploring the desert?
Bring several early meals, check all five HUD stats, and preserve enough stamina for a retreat. Use the stone castle and hills as return landmarks, and avoid crossing the entire region without a route back. A large insect with full resources can treat the desert as a hunting zone; a small one should make shorter probes.
When does the desert Sand Worm become available?
Community data ties the desert Sand Worm to the November 9 update, and the underground cave is announced for November 19. Exact encounter details remain unverified as of October 30, 2026, so players should confirm the current patch before planning around specific spawn points, rewards, or attack patterns.
Which Bug Evolution landmarks help with desert navigation?
The stone castle is the strongest shared reference, while the hills and field edge help identify the transition from the safer fields. Grass formations can also serve as route markers, although they change more often. A reliable navigation method is to memorize a sequence of landmarks and test the return journey before attempting a deep desert hunt.